Friday, November 26, 2010

Daal (spiced lentils)

Lentils make a hearty and healthy side dish or soup base that can be prepared in many ways. Daal is a classic Indian dish, sometimes strongly spiced. This version is a little milder, but quite delicious as an accompaniment to citrus flavors or delicate dishes like fish. If you want to make the lentils into a meal, add a little cooked chicken or lamb.


Daal
Servings: 4-6
Time: 30-35 minutes

- 1 cup red lentils
- 1 inch piece fresh ginger, peeled, quartered
- 2 garlic cloves, finely chopped
- 1 tablespoon vegetable or mild olive oil
- 1/4 teaspoon turmeric
- 1/2 teaspoon salt
- 1/2 teaspoon cayenne (red) pepper (less for milder)
- 1 teaspoon cumin


Place lentils in medium pot and cover with a little less than 1 inch of water. Stir in ginger, salt, cayenne, and turmeric. Bring lentils to a boil and then turn heat to low and continue simmering for 25-30 minutes. When done, lentils will be tender and most of the liquid will have been absorbed.

In the meantime, heat oil in small skillet. Add garlic and saute for 1-2 minutes. Don't let the garlic become golden. Add cumin and stir for 30 seconds. Stir garlic mixture into lentils before removing them from stove and serving. Try a little and add more salt and pepper to taste.


For some extra flavor, stir in some fresh, diced tomatoes and cilantro about 5 minutes before you finish cooking the lentils.

Saturday, November 20, 2010

French Onion Soup

Everyone has their own version of course, but this is the one that we make on lazy weekends.


French Onion Soup
Servings: about 6
Time: 1-1.5 hours

- 6 cups beef stock
- 4 large to 6 small onions (at least half red)
- 2 tablespoons olive oil
- 1-2 large garlic cloves (chopped)
- 1/2 cup DRY red or white wine (we prefer red)
- 1/2 teaspoon thyme
- 1 small bay leaf
- pinch white pepper (black is ok)
- baguette (sliced)
- swiss or another melty cheese (Gruyere and Jarlsberg are really good)- grated

Cut onions in half and thinly slice. Caramelize onions in 2 batches (if you have a large soup pot and a large skillet or second pot, cook them at the same time!). To do this, heat 1 tablespoon of oil over medium heat. Add onions and stir occasionally as they soften and cook for the next 20 minutes.


It is important to try to AVOID non-stick pans. You want the onions to stick a little and develop a nice brown tinge. This caramelizing process brings out the sweetness of the onions.


The batches above need a few more minutes, but you can see the beginning of caramelization. Once the 20 minutes are up, add the garlic to one batch, stir, and continue cooking. Add the wine to the second batch and cook both until the wine is reduced/absorbed by the onions (another ten minutes or less).

Combine the onions into one large soup pot and add 5.5 cups of beef broth and seasonings. Stir, breaking up the browned bits that stuck to the bottom of the pot during caramelization. Add the rest of the broth to the second (now empty) pan, heat gently, and scrape up browned bits. Add this mixture to the large soup pot. Simmer the soup for 20-30 minutes. Salt to taste but go easy because adding the cheese later will add salt. In the meantime, toast baguette slices in the oven.


Once the soup is done, ladle servings into oven-proof bowls (if you're not a fan of pieces of onion, simply strain the soup and keep the delicious broth). Heat broiler. Top soup with 2-3 baguette slices and top all of that with grated cheese.


Broil soup 2-3 minutes or until cheese is bubbly and browning slightly.

Sunday, November 7, 2010

Icenhauer's and The Rainey St. Scene

For those of you who don't live in Austin, this post is only going to make you jealous...which is another reason to come down and visit us!

Rainey St.
We all know that downtown Austin has changed a lot in recent years. But as is characteristic of the city, another new bar/food scene has popped up in a little neighborhood that no one knew existed until a few months ago. Remember what Red River used to be like before Club DeVille and gourmet food-carts? How about West 6th before Molotov's? Nope, me neither! Welcome to Rainey Street, Austin's newest, "secret" bar scene...and also a cute residential neighborhood where real people still live. It will be interesting to see what happens in the future regarding noise ordinances and such. While it's awesome to have a "neighborhood bar," it's not so nice when it's literally in your neighbor's house and strangers from around Travis County are descending upon your quaint neighborhood. However, I have to admit that these little bungalow houses turned indy bar scene are pretty awesome and definitely relaxed in the old Austiny kind of way. I've only been to a few of these rogue bars so far, but I like the atmosphere a lot. This area is also home to similarly rogue, and abruptly famous food places like Garage-mahal (delicious trailer-Indian food), which are certainly going to contribute to a huge increase in popularity very soon. Just my own prediction...
Here are a few of the new bars to check out:

Lustre Pearl
As with many of the Rainey St. suds shops, this one sports a great outdoor seating area. I haven't been to Lustre myself yet, but Rob tells me that it's a casual place with the added bonus of actual, regulation ping-pong tables. This one has a prime location on the corner opposite a (currently) $5 parking lot.

www.lustrepearlaustin.com

Clive Bar
Located across the street from Garage-Mahal and other eateries, this place has a fantastic porch with rustic little wooden benches and crates for your comfort. More evidence that these are grown-up places: clean bathrooms with working doors and paper towels.

www.clivebaraustin.com

Icenhauer's
We didn't spend a lot of time here, but I will definitely be going back, mainly for the delicious drinks. This place is starting to become known for its classical bartending and signature drinks, many of which are made with fresh ingredients. My favorite is a light drink that is a mix of champagne and elderflower liquor. Another big hit that packs a little more punch is a vodka-based beverage with freshly muddled strawberries and basil. These are really amazing. You need to taste one for yourself!

Facebook | Icenhauer's

Thursday, October 28, 2010

Guest Star: Chicken Enchiladas

This recipe comes from Eric, who says: "This is one of a few recipes that I know from heart. It’s a recipe that my mom got from a family friend, but it’s been tweaked over the years. One of the great things about it, is it’s easy to adjust for anybody’s personal taste – just add or eliminate items in the filling (e.g., green onions or olives) as you see fit – or even if you are missing an ingredient in your pantry. It works very well with fat free/ reduced fat ingredients. The enchiladas aren’t very spicy, so you can always add heat to the enchilada sauce or use hotter peppers. In the end, though, this dish is creamy, cheesey, and heats up nicely the next day." Sounds fantastic to me!


Chicken Enchiladas
Serves: 4-6
Time: 1 hour (30 prep, 30 in oven)

4 skinless, boneless chicken breasts, cubed, cooked, and cooled
16 oz. sour cream
2 cans condensed Cream of Chicken Soup (Cream of Celery or Mushroom can work, too)
1 bunch of green onions
1 small can (4 oz) diced green chiles
10 tortillas (12-inch)
Enchilada sauce, red (15-20 oz)
½ - ¾ lbs of cheese (cheddar and jack mix)
sliced black olives and jalapeƱos (optional)

Preheat oven to 350°. Pour a little enchilada sauce into the bottom of a rectangular casserole dish to coat all sides.

Combine chicken (cooked ahead of time, I usually boil it), sour cream, soup, green onions, and chiles in a medium bowl and mix well. Set 1 cup of the mixture aside.

To assemble an enchilada: pour a small amount of enchilada sauce onto a plate and coat both sides of a tortilla with the sauce. Spoon the filling mixture onto the tortilla (usually 2-3 healthy spoonfuls are enough). Roll the tortilla and place in the casserole dish, seam down. Continue to assemble the remaining enchiladas to fill up the casserole dish.

Combine any remaining enchilada sauce with the cup of filling set aside (and any filling that might be left over). Spread the mixture over the enchiladas in the casserole dish. Cover the enchiladas with cheese, and decorate with sliced olives and jalapeƱos if desired.


Bake uncovered for 20-30 minutes until the cheese is melted, bubbly, and delicious.

Thursday, October 21, 2010

Pizza Rustica

What could be better than a simple, delicious pizza? The tiny, fresh tomatoes in this recipe are key. They stand in for sauce and are a little sweet, balancing nicely with other simple ingredients, like fresh herbs.


Pizza Rustica
Servings: 4-6
Time: 35 minutes (20 prep, 15 in the oven)

13 oz pizza dough (buy it to save time; fits standard cookie sheet)
8 oz fresh mozzarella sliced into ovals
1 pint of grape or small cherry tomatoes
1 table spoon olive oil
1 teaspoon Dried rosemary
1-2 cloves garlic, finely chopped
1/8 of a teaspoon of salt
Red Pepper flakes
Fresh spinach (or basil if you want more flavor)

Preheat oven to 425 degrees. Place tomatoes and olive oil into frying pan and cook over medium low heat, stirring every once in a while.

Meanwhile, Roll out dough onto lightly greased or parchment covered cookie sheet.

Check on tomatoes. They should cook for about 5 minutes. When they start to become soft, add the garlic, herbs, salt, and a shake of red pepper flakes. Continue stirring and cooking until you can easily pop or crush tomatoes with the back of a wooden spoon or spatula. Remove from heat at that point, and crush the remaining tomatoes.

Place mozzarella slices directly onto the dough, spacing them equally apart so that when they melt, the cheese will cover the entire pie. Using a spoon, drop small amounts of tomato mixture in different places directly on top of the cheese and dough.

Place fresh spinach or basil leaves in between the tomato splotches.

Place pizza in oven and cook until the cheese is melted and turning golden brown in some spots and the crust is golden.

Wednesday, August 4, 2010

JaneWay's Famous Chicken Salad

Looking for something light and crisp for the summer? Rob's mom has a great chicken salad recipe that includes grapes and almonds. The fruit is refreshing and makes this recipe stand out from other chicken salads. JaneWay usually serves this in a wrap, which is great for a quick dinner, outside food, or as a meal on the go. The not as famous PaulWay substituted in some delicious sheep cheese once, which pairs surprisingly well with the grapes, but only if you like very strong cheese!

JaneWay's Famous Chicken Salad
Servings: 6-8
Time: 35 minutes prep + chilling

- 5 medium-sized chicken breasts
- parmesan cheese (grated)
- 1 packet dry Italian seasoning
- garlic powder
- 4 good-sized celery stalks (chopped)
- 1.5-2 cups red grapes (sliced in half)
- 3/4 to 1 cup light mayonaisse
- 1 tablespoon lemon juice
- salt and pepper to taste
- 1/2 cup sliced almonds (optional)

Coat chicken in a mix of parmesan cheese and Italian seasoning. Add a few shakes of garlic powder. Bake chicken for 25 minutes at 400 degrees. Let cool and cut into bite-sized pieces.

Mix together chicken, celery, grapes, mayo, lemon juice, and salt and pepper. Chill well. Shortly before serving, mix in the almonds.

Sunday, April 18, 2010

Sweet Potato and Black Bean Tacos

Made this one up after a long week of eating out. For some reason goat cheese really goes well with sweet potato and sweet squashes, like pumpkin. This is completely veggie, by the way.

Sweet Potato and Black Bean Tacos
Servings: 6 tacos (2-3 people)
Time: 25 minutes

6 flour tortillas (about 8")
1 large sweet potato (1 pound; yam, really)
1 can black beans, rinsed and drained (14.5oz)
2 small garlic cloves, finely chopped
1 teaspoon cumin
olive oil
1/4 of a small red onion, sliced paper thin
1/4 cup or more cilantro
crumbled feta
lime juice
tomatillo-green chili salsa (optional)

Peel sweet potato and cut into 1/2 inch pieces. Place potato in 2 quart pot, cover with water, bring to a boil. Lower heat to medium-low and cook until tender, about 20 minutes. While the potato cooks, slice onion and chop or pluck (leaves whole) cilantro, setting aside for later. place black beans, garlic, and cumin into a medium frying pan. drizzle with olive oil, stir, and heat through, about 5-7 minutes. When the potatoes are done, drain water. Add bean mixture to potatoes, squeeze in a little lime juice (1 teaspoon or less), and mash roughly with a fork. There should be enough filling for about 6 tacos. Before rolling, top filling with cilantro, onion, and feta to taste. Green chili-tomatillo salsa is nice for dipping or on top, to add some heat!

Sunday, April 4, 2010

Curried Salmon

After discovering sushi I feel a little bad when I actually cook salmon. I like fish dishes, don't get me wrong, but salmon in particular is just so much better raw. Really! But I'd never try to make my own sushi with the stuff at the grocery store...much safer cooked. As a result, I've tried many fish recipes with all different kinds of fish, and I've found a few that I really like. The one below is a favorite not only because it's delicious, but also because it's minimal prep, minimal clean-up, and fast! The fish cooks inside of a handy, foil-package. It's easy to adapt this method for use with other fish recipes, too!

Curried Salmon
Servings: 2
time: 20-30 minutes

2 pieces of salmon (4-6oz each)
1/2 of a small onion (sliced)
2 roma tomatoes (chopped)
1 teaspoon curry powder
1 teaspoon garlic powder
1/2 teaspoon salt
1/4 teaspoon black pepper

Preheat oven to 400 degrees. Mix curry powder, garlic powder, salt, and pepper in a small bowl. Place each piece of fish, skin side down, onto an individual square of foil. Make sure that the square will be large enough to 'tent' or completely package the fish. Sprinkle spice mixture over top of fish pieces. Then top each fillet with onions and tomatoes. Fold the foil over the fish and tightly press together the edges of the foil to seal the packages. Place packages on a baking sheet and bake in oven for 10-15 minutes (depending on thickness). The fish is ready when opaque and flakes easily with a fork.

Monday, March 22, 2010

Artichokes (and how to eat them)

Artichokes are actually a type of flowering thistle. The artichoke itself is the bud of the flower. If you haven't had one before, eating an artichoke might seem a little strange. Once you've had one though, you will understand how simply delicious artichokes can be. They are also surprisingly easy to prepare. Methods range from stuffing and baking, to pickling, and steaming. The recipe that I share below mostly involves a gentle boil, and the artichoke is eaten with a light lemon-butter sauce. If that doesn't entice you, artichokes were historically thought to be an aphrodisiac. Yup

Artichokes (and how to eat them)
Servings: 2 (only 2-3 fit in a pot!)
Time: 45-55 minutes (5 minutes prep)

2 medium to large fresh artichokes
2 cloves of garlic
1 tablespoon olive oil
lemon juice
butter (melted)

Fill a large, 4-5 quart pot with water. Add no more than a tablespoon of olive oil. Peel the garlic, slice into a few, large pieces and add to the pot as well. Bring water to boil. Using a large knife, cut about an inch off of the top of the artichoke. The idea is to rid the 'leaves' of many of their thorny tops. Some people like to get the tops of any missed leaves with a pair of kitchen scissors. Cut off the stem, leaving an inch or less at the base. Once the water boils, carefully drop in the artichokes. Reduce the heat to medium or even medium low, keeping the water at a gentle, rolling boil. I usually cover the artichokes while they cook, although some people leave the lid off to decrease the bitterness of the artichokes. The artichokes will pretty much be fine on their own while they cook for about 45 minutes to an hour, depending on the size of the artichoke (larger ones take longer). I do like to roll the artichokes around in the water with a fork, occasionally. When done, the leaves should be able to be easily separated from the base.

To make the dipping sauce, combine 2 tablespoons of melted butter with about a table spoon of lemon juice. Add more lemon juice to taste. The sauce should be on the tart side, as it pairs really well with the slightly bitter artichoke.


How to Eat Artichokes
1. Peel off each of the primary 'scales' - the leaf looking things - and draw the base of the scale through your teeth, scraping off the delicious, tender meat.

2. As you get closer to the center the 'scales' will become much smaller and translucent. Some may be purple. You can carefully bite off the base, but stay away from the small spine at the tip!

3. When you get to the 'choke' (really the unopened flower), which looks stringy in the photo below, you'll need to scrape off all the chokey bits (Don't eat), leaving the 'heart'(base) intact.


4. Cut up the tender heart and stem and dip in the butter. Definitely the best part of the artichoke!

Monday, March 15, 2010

(Mostly) Greek Pasta

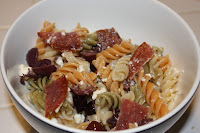
This is a robust, strongly flavored pasta dish. Why only "mostly" Greek? Well, it involves Italian hard salami and some Italian seasoning. To make this all Greek, substitute cooked ground lamb for the salami. If you're vegetarian, or are in the mood for lighter fare, simply leave out the meat entirely or substitute veggies like tomato or zucchini. This dish comes together very quickly!


(Mostly) Greek Pasta
Time: 20 minutes
servings: 3-4

12oz spiral pasta
6 slices of hard salami, approx. 3-4 inches in diameter (deli counter style)
4oz crumbled feta cheese
1 cup of Kalamata olives
olive oil (bit less than 1/4 cup)
6 small garlic cloves
Italian or Tuscan seasoning

Fill 4 or 5 quart pot about 2/3 full of water for pasta. While waiting for water to boil, cook slices of salami in medium skillet. You may need to cook them in two batches to make sure that the slices are not overlapping. Cook salami until just beginning to crisp. Remove from pan to a plate or cutting board and wipe out skillet (unless you want the added flavor of salami fat!). Peel garlic cloves and thinly slice.

Once the water boils, add pasta and cook for about 10-12 minutes. We love using tri-color pasta. Any pasta shape will work, but spirals hold the cheese the best. While pasta is cooking, add oil and garlic to skillet and cook over medium heat until garlic is just turning golden. Add 2-3 good shakes of the Italian seasoning and cook about 30 seconds longer. Remove oil and seasonings from heat. While the pasta is cooking and the garlic is sauteing, you should have enough time to roughly chop the olives. In addition, stack the salami and slice into 1 inch pieces.

When tender but firm (try a piece!), drain pasta, return to pot and pour oil and seasoning over. Mix in salami, olives, and then finally, the feta cheese.


Wednesday, March 10, 2010

Jerk Chicken

Jerk Chicken, otherwise known as "Rob" Chicken....jk! Let's see how long it takes for him to notice.
As I was saying, Jerk Chicken and other "jerked" dishes are very common to Caribbean cultures, especially Jamaican. In the traditional Jamaican preparation, spices, including the exceedingly hot Scotch Bonnet Pepper, are dry-rubbed into the meat and the chicken, pork, or what-have-you is slow smoked. I'm not an expert, of course, but I did modify and put together a delicious recipe that represents the flavor of Jerk seasoning very well. It's also an easy dish to prepare. The seasoning and sauce can be made the previous day and the chicken can marinate overnight. When you're ready to start dinner, just pop the entire dish into the oven and you're good to go. I usually do the sauce and marinade just before bed, when I'm too tired to continue writing my dissertation...

Jerk Chicken
time: 15 minutes prep (previous night); 50 minutes oven
servings: one batch of spices will cover about 10 medium chicken legs

3 tablespoons dark rum
2 tablespoons water
1/2 cup malt vinegar (or 1/3 cup cider vinegar)
10 green onions, roughly chopped
4 garlic cloves, roughly chopped
2 tablespoons dried thyme
1 Serrano pepper with seeds (or a habanero if you enjoy fire)
2 tablespoons vegetable oil
4 teaspoons ground allspice
4 teaspoons ground ginger
4 teaspoons ground cinnamon
2 teaspoons ground nutmeg
2 teaspoons salt
2 teaspoons ground black pepper
2 teaspoons dark brown sugar

1 cup ketchup
3 tablespoons soy sauce
10 chicken legs (approximate)
1/4 to 1/3 cup fresh lime juice

Boil rum and 2 tablespoons water in small pan for 2-3 minutes. Add the boiled rum mixture to blender; add vinegar and next 12 ingredients and blend until nearly smooth. Remove 2 tablespoons of the blended seasoning to a small bowl and then mix in ketchup and soy sauce to make sauce. Sauce can be made 1 day ahead, refrigerate.

Place chicken in large roasting pan or oven-proof baking dish. Pour lime juice over and make sure all sides of the legs are coated. Spoon the remaining jerk seasoning over chicken and rub into meat, covering all surfaces. Cover the dish and refrigerate at least 4 hours, or as long as 1 day ahead (basically from the night before you plan to cook it).

When you're ready to cook the chicken, preheat oven to 350 degrees. Bake until chicken is cooked through and juices are clear when you cut into the thickest part of the meat, about 50 minutes (internal temperature at least 170 degrees). Make sure to serve the jerk sauce (the ketchup mix) along with the chicken!


These would probably be nice on the grill, too!

Monday, March 1, 2010

Guest Star: Lobster Rolls

Another special guest recipe, this time brought to you by Sterling! If you can't get lobster or prefer a different filling, I think that crab or shrimp would substitute nicely.

Lobster Rolls

1 - lobster tail (4oz) per sandwich.
1 - dinner roll per sandwich
¼ cup mayonnaise
some butter
-lemons

Spices
-Tony Chachere’s Original Creole Seasoning
-Kosher Salt
-Freshly ground pepper

Lobster- frozen or thawed
Turn each lobster tail upside down and cut one slit on each side of the shell. Detach the thin portion of shell covering the meat. Sprinkle lemon juice over the exposed meat. Place into oven (450 degrees) for 16-20 minutes. Once done, the meat should be white and the tails tend to curl a bit.

Roll prep
Heat up a cast iron pan on the stove and melt butter into it. Cut each roll in half and place on heated pan.

Sauce
Put ¼ cup mayonnaise in a bowl and mix with salt, pepper, and Tony Chachere’s Original Creole seasoning to taste. Add lemon juice.

Putting it together:
Once the lobster is done, remove meat from the shell with a knife and fork. Cut up the lobster into small ¼ inch chucks, mix with sauce, and place on the roll. Can either be served hot or cold. Sterling prefers hot, so he recommends putting the rolls in the microwave for 25-30 seconds.

Wednesday, February 10, 2010

Italian Cheesecake

Ok, so I'm not really a baker, but I must share this delicious recipe with you. I promise that it is very easy. It's also not quite as bad for you as regular cheesecake. That's because Italian Cheesecake is actually more of a cheese-pie and is made with ricotta instead of cream cheese. As a result, the texture is a bit different from regular cheesecake...more rustic perhaps? But definitely delicious! This recipe comes from my mom. By the way, the 'true' way to say "ricotta" is rig-aw-ta, or even just rig-awt. Sound like a Soprano the next time you're at the store!

Italian Cheesecake
time: 15 min prep, 80 min oven

1 frozen pie crust (thawed)
3 and 1/2 cups ricotta cheese (whole milk gives a slightly moister cake, so watch the cooking time more carefully if you use reduced-fat)
1/4 cup flour (all purpose)
1/2 teaspoon salt
1 tablespoon grated lemon peel
1 tablespoon grated orange peel (or another lemon if you were too lazy)
1 tablespoon vanilla
4 eggs
1 cup sugar
ground cinnamon (optional)

Arrange pie-crust in a lightly greased pie-pan. Preheat the oven to 350 degrees. In a large bowl, mix together the cheese, flour, salt, grated lemon peel, grated orange peel, and vanilla. Next, beat in 4 eggs. Add sugar gradually, mixing well in between additions. Pour filling into pie-crust. Tilt and gently shake pan to ensure an even distribution. Bake until pie is firm (but not dry and cracking!), about 1 hour and 20 minutes. Cooking time will vay a bit from oven to oven. If you use reduced fat ricotta you may need less cooking time. Let the cheesecake cool at room temperature. If you want, sprinkle with ground cinnamon before serving. The cake can be served warm or cold and goes really well with coffee.

The top of the pie should be a light golden-tan color. This is NOT my pie...i'll try to make one soon, but it demonstrates fairly well what to aim for. I'd even go a tad lighter on the cooking.

Saturday, January 30, 2010

Barley Beef (or Mushroom) Stew

If you're a vegetarian (or if you just love mushrooms) substitute 12oz shitake or crimini mushrooms for the beef and exchange vegetable broth for the chicken broth. See below for equally awesome alternative version with sausage, leeks, and kale!

Barley Beef Stew
Time: 30-40 minutes
Servings: 6

12-16oz lean stew beef (cubes)
4 cloves of garlic, chopped
1-2 tablespoons of oil
1 teaspoon rosemary
14oz diced tomatoes in juice
15-19oz cannelini (white kidney) beans
1 and 1/4 cup pearl barley (approximate)
6 cups of chicken broth
5-9oz of spinach
salt (depending on how much you like it)
pepper
cornstarch

Toss beef in cornstarch with a few shakes of salt and pepper (optional). Heat 1 tablespoon of oil in large pot (4-5 quarts; non-stick optional, but less messy). Add garlic and saute 1 minute. Add second tablespoon of oil and beef. Brown beef on all sides. Add rosemary, stir 30 seconds. Add tomatoes, 4 cups broth, and barley. Bring to boil, then set to low, cover, and cook for about 20 minutes, until barely is just tender. Add two more cups of broth. Add beans and stir. Add spinach a bunch at a time and stir into stew before adding the next bunch. The stew will look pretty full, but as the spinach wilts there will be room for more. Cook for another 5 minutes to meld flavors. Salt and pepper to taste and enjoy!


Exciting alternate version with leeks, italian sausage, and kale (no beans). Saute the leeks with the garlic and make sure the leeks are tender before adding the sausage. Kale will take longer than spinach to cook all the way through.

Monday, January 4, 2010

Chicken Parm

This is an easy recipe, although it is not necessarily a quick one depending on how many pieces you want to make. It is, however, definitely delicious. Secrets? You must have a good sauce and well-seasoned breadcrumbs. That's it really. Oh, and it helps to have thin pieces of chicken. In the first part of the recipe you basically make delicious chicken cutlets, so stop there if you're not in the mood for Italian. I usually serve chicken parm with mashed potatoes rather than pasta because the leftover sauce and cheese are awesome when mixed into the potatoes.

Chicken Parm
Serves 4 (well, just keep adding chicken if you want more!)
Time: ~30 minutes prep, 15 in the oven

- 4 chicken breasts (thinner is better; sometimes marked as "for milanesa" at HEB
- 1 egg per 4 chicken breasts
- 1 cup Italian-seasoned breadcrumbs. I always use Progresso.
- olive oil (NOT extra virgin - we are frying)
- 16oz (about) tomato sauce. I love Classico Four Cheese. Not sweet, and not overly cheesey.
- 1 cup shredded mozzarella cheese (more if you like!)

Beat egg in a wide, shallow bowl. Pour out 1/4 cup of breadcrumbs on a plate. Rinse chicken and trim fat if you like. Add olive oil to a skillet or frying pan so that bottom is completely covered with about 1/4 to 1/2 inch of oil (the bigger the pan, the more chicken you can cook at once!). Heat olive oil over medium heat. Dip chicken into egg and make sure that it is completely coated. Dredge chicken in breadcrumbs to cover all surfaces. Repeat with the other pieces of chicken, adding more breadcrumbs for dredging as the breadcrumbs get used up. Add chicken to hot olive oil and fry, turning over once. You should flip the cutlets after the first side is nice crispy, but not burnt. When cooked through, chicken should no longer be pink inside and the breadcrumb coating should be a nice orangy-brown on both sides. Place chicken cutlets on papertowl-lined plate to drain. Viola! Delicious chicken cutlets.

Preheat oven to 350 degrees. While waiting, coat bottom of a baking dish (glass works best) with about 1/2 inch of tomato sauce. Arrange chicken cutlets in dish, on top of sauce. Cover chicken with the rest of the tomato sauce. 16oz will definitely be enough to top 4 pieces, but use more sauce if you've made more chicken. Sprinkle cheese evenly on the pieces of chicken (again, if you've made more than 4 pieces, you'll need more than 1 cup). The amount of cheese is really at your discretion, but the idea is that the cheese should melt and form a continuous, delicious layer. Place dish in oven and bake for 15 minutes or until cheese is completely melted and has started to bubble/brown.


This batch was made with slices of fresh mozzarella